
Budget friendly shaker style kitchen cabinet design ideas offer a delightful challenge: creating a stunning, functional kitchen without breaking the bank. Shaker cabinets, known for their timeless appeal and clean lines, are surprisingly adaptable to budget-conscious projects. This guide explores clever design choices, material selections, and DIY strategies to help you achieve the kitchen of your dreams without exceeding your budget.
We’ll cover everything from planning your layout and choosing cost-effective materials to mastering DIY installation and adding stylish finishing touches.
From selecting the right wood type (pine, maple, or even MDF) and considering paint or stain finishes to exploring budget-friendly hardware and countertop options, we’ll equip you with the knowledge and inspiration to transform your kitchen. We’ll also delve into creative space-saving techniques like incorporating open shelving and maximizing storage within your cabinets. Get ready to discover how to achieve a high-end look without the high-end price tag!
Introduction to Budget-Friendly Shaker Style Kitchen Cabinets
Shaker style kitchen cabinets offer a timeless appeal, characterized by their simple, clean lines and functional design. Their enduring popularity stems from their versatility – they complement a wide range of kitchen styles, from traditional to contemporary, making them a smart investment that won’t date quickly. The recessed panel doors and lack of excessive ornamentation contribute to a sense of understated elegance that can elevate the overall look of your kitchen without breaking the bank.A well-planned budget is crucial for achieving a stylish and functional shaker kitchen without overspending.
Careful planning allows for prioritizing essential elements, making informed material choices, and avoiding costly mistakes. By setting a realistic budget and sticking to it, you can maximize your resources and achieve a stunning result that fits your financial constraints. This involves researching prices, comparing quotes from different contractors or suppliers, and exploring DIY options where feasible to reduce labor costs.
Cost-Effective Materials for Shaker Cabinets, Budget friendly shaker style kitchen cabinet design ideas
Several materials offer a good balance between affordability and quality for shaker style cabinets. Medium-density fiberboard (MDF) is a popular choice due to its smooth surface, making it ideal for painting. It’s relatively inexpensive compared to solid wood but requires careful handling to prevent damage. A cost-effective alternative to solid wood for cabinet boxes is plywood, offering good strength and durability at a lower price point.
For doors and drawer fronts, MDF painted in a durable finish can mimic the look of more expensive wood options. Consider using less expensive hardwood for visible areas like doors and drawer fronts, reserving more economical materials for less visible parts of the cabinet. For example, you could opt for a less expensive wood like pine for the cabinet boxes and a more visually appealing hardwood like oak or maple for the doors.
Remember, smart choices in material selection can significantly impact the overall cost without sacrificing the aesthetic appeal of your shaker cabinets.
Planning and Design Considerations
Creating a budget-friendly shaker kitchen requires careful planning and design choices. Optimizing space and selecting the right cabinet style and construction method are crucial for achieving both style and affordability. The following sections detail key considerations to help you design your dream kitchen without breaking the bank.
Budget-friendly shaker style kitchen cabinets offer a timeless appeal, balancing practicality with aesthetic charm. For a more contemporary feel, consider incorporating elements from modern kitchen cabinet design ideas with minimalist style , such as sleek hardware or simple, clean lines. Ultimately, even budget-conscious shaker designs can achieve a sophisticated and modern look with thoughtful planning and clever choices.
Sample Kitchen Layout
A well-designed layout maximizes space and workflow. This example uses a standard 10ft x 12ft kitchen space. The table below illustrates a possible arrangement using shaker cabinets, with approximate dimensions. Remember that these are just suggestions; you’ll need to adjust based on your specific needs and appliances.
| Area | Dimensions (ft) | Cabinet Type | Notes |
|---|---|---|---|
| Sink Area | 3ft x 2ft | Base Cabinets (30″ sink base, 15″ corner cabinet, 15″ base cabinet) | Allows ample counter space around the sink. |
| Cooking Area | 4ft x 3ft | Base Cabinets (30″ range cabinet, 30″ base cabinet), Wall Cabinets (30″ x 30″ above range, 30″ x 15″ either side) | Provides sufficient storage and counter space for cooking. |
| Refrigerator Area | 3ft x 2ft | Tall Pantry Cabinet (36″ wide), Base Cabinets (15″ base cabinet) | Integrates the refrigerator seamlessly into the design. |
| Dining/Prep Area | 4ft x 4ft | Island with base cabinets and overhang for seating (4ft x 2ft), Wall Cabinets (30″ x 30″ above island) | Provides additional counter space and seating. |
Shaker Cabinet Door Styles and Cost
Shaker cabinets offer various door styles, each impacting the overall cost. Simpler styles, like a flat-panel shaker, generally cost less than more ornate styles featuring raised panels or intricate detailing. The complexity of the door’s construction directly influences the labor and material costs. For example, a raised-panel shaker door requires more intricate joinery and finishing, resulting in a higher price compared to a simple flat-panel design.
A beaded inset shaker door, offering a slightly more detailed look than a flat panel, falls somewhere in between.
Pre-made versus Custom-made Cabinets
Pre-made cabinets offer significant cost savings compared to custom-made options. Pre-made cabinets are mass-produced, leading to economies of scale that translate to lower prices for consumers. However, this often means limited customization options in terms of size, finish, and features. Custom cabinets, while more expensive, allow for precise tailoring to your kitchen’s dimensions and aesthetic preferences. For a budget-friendly approach, carefully measuring your space and selecting pre-made cabinets that closely match your needs is often the more economical choice.
However, if your kitchen has unusual dimensions or requires highly specific features, the investment in custom-made cabinets might be justified. Consider the trade-off between cost and customization when making your decision.
Material Selection for Cost-Effectiveness
Choosing the right materials is crucial for creating budget-friendly shaker style kitchen cabinets. The balance between cost, durability, and aesthetics needs careful consideration. Understanding the properties of different materials will help you make informed decisions that won’t compromise the overall look and feel of your kitchen.Selecting materials impacts not only the initial cost but also the long-term durability and maintenance of your cabinets.
A slightly higher upfront investment in a more durable material might save you money in the long run by avoiding costly repairs or replacements. Let’s explore some options.
Wood Types: Cost and Durability Comparison
The choice of wood significantly influences both the cost and the lifespan of your shaker cabinets. Here’s a comparison of popular options:
- Pine: Pine is a softwood, making it relatively inexpensive and easy to work with. It’s lightweight and readily accepts paint or stain, making it a popular choice for budget-conscious homeowners. However, it’s softer than other woods and more prone to dents and scratches. Expect a shorter lifespan compared to harder woods if not properly protected.
- Maple: Maple is a hardwood known for its durability and strength. It’s more expensive than pine but offers superior resistance to damage. Its smooth, fine grain accepts both paint and stain beautifully, providing a classic and elegant look. While more expensive initially, the longevity makes it a worthwhile investment for some.
- Medium-Density Fiberboard (MDF): MDF is an engineered wood product made from wood fibers and resin. It’s very affordable and provides a smooth, consistent surface ideal for painting. However, it’s not as durable as solid wood and is susceptible to moisture damage. Proper sealing is essential to prevent warping or swelling.
Enhancing Appearance and Cost-Effectiveness with Paint or Stain
Painting or staining your cabinets can significantly impact their final look and overall cost. Using a less expensive wood like pine or MDF and then painting it a high-quality, durable finish can create a beautiful and cost-effective alternative to using expensive hardwoods. A well-applied paint finish can mask imperfections in the wood, creating a uniform and professional appearance.
Budget-friendly shaker style kitchen cabinets offer a classic look without breaking the bank. To elevate the design and add functionality, consider clever lighting solutions; check out this article on creative ways to incorporate lighting into kitchen cabinet designs for some great ideas. Adding under-cabinet lighting, for example, can dramatically improve the kitchen’s ambiance while staying within a reasonable budget, perfectly complementing your shaker style cabinets.
Stain, on the other hand, highlights the natural wood grain, offering a different aesthetic appeal. Choosing a stain allows for a more natural and less uniform appearance, which may be preferred by some homeowners.
Budget-friendly shaker style kitchen cabinets offer a classic look without breaking the bank. Their clean lines and simple design make them incredibly versatile, adapting well to various kitchen styles, including those in open floor plans. For inspiration on maximizing space and style in an open-plan kitchen, check out these kitchen cabinet design ideas for open floor plan homes ; then, return to your shaker style plans, confident in your ability to create a stunning, affordable kitchen.
Alternative Materials: Laminate and Vinyl Wrap
Laminate and vinyl wrap offer significantly more budget-friendly options compared to wood.
- Laminate: Laminate is a durable and relatively inexpensive material that mimics the look of wood or other materials. It’s resistant to scratches and stains, making it a practical choice for high-traffic areas. However, it can be less visually appealing than real wood and may not offer the same level of sophistication. Edges can be prone to chipping if not carefully installed.
- Vinyl Wrap: Vinyl wrap is a thin, adhesive-backed film that can be applied to existing cabinet doors and frames. It’s extremely affordable and offers a wide range of colors and patterns. However, it’s less durable than laminate and can peel or tear over time, especially with frequent use or exposure to moisture. It also lacks the tactile quality of real wood.
Hardware and Finishing Touches
Adding the perfect hardware and finishing touches can elevate your budget-friendly shaker kitchen cabinets from simple to stunning. The right choices can significantly impact the overall look and feel, creating a high-end aesthetic without breaking the bank. Careful consideration of hardware style, countertop material, and finishing techniques will ensure a cohesive and stylish kitchen design.Choosing the right hardware and countertops is crucial for achieving a cohesive and stylish kitchen design.
The finishing touches, such as paint or stain, will further enhance the overall look and feel, tying everything together beautifully. Remember, even small details can make a big difference.
Budget-Friendly Cabinet Hardware Options
Numerous affordable hardware options can complement shaker cabinets without compromising style. Consider these choices for a sophisticated yet budget-conscious approach. Simple, clean lines are key to maintaining the shaker aesthetic.
- Black matte knobs and pulls: These offer a modern, sleek look that contrasts beautifully with lighter-colored cabinets, adding a touch of sophistication without being overly expensive.
- Brushed nickel hardware: A classic and versatile choice, brushed nickel provides a subtle sheen that works well with various color palettes and cabinet styles. It’s readily available at most home improvement stores and often comes at competitive prices.
- Simple cup pulls: These minimalist pulls are both functional and stylish. They are often less expensive than more ornate options while still offering a clean, contemporary look.
- Distressed bronze hardware: For a more rustic or farmhouse feel, distressed bronze hardware offers a unique character and warmth, adding a touch of vintage charm without the hefty price tag of solid bronze.
Cost-Effective Countertop Options
The countertop selection significantly impacts the overall kitchen design and budget. Several cost-effective options can complement the clean lines of shaker cabinets. Consider durability, maintenance, and style when making your choice.
- Laminate countertops: Laminate offers a wide variety of colors and patterns, mimicking more expensive materials like granite or marble at a fraction of the cost. It’s durable and easy to maintain, making it a practical choice for busy kitchens.
- Butcher block countertops: Butcher block countertops provide a warm, rustic feel and are surprisingly affordable, especially if you opt for a less expensive wood like maple or pine. They require regular oiling but offer a unique and durable surface.
- Solid surface countertops (e.g., Corian): While slightly more expensive than laminate, solid surface countertops offer a seamless, non-porous surface that is easy to clean and maintain. They are available in a range of colors and patterns and provide a more upscale look than laminate.
- Tile countertops: Ceramic or porcelain tiles offer a wide range of design options and are relatively inexpensive. They are durable and easy to clean, making them a practical and stylish choice.
Achieving a Professional Finish with DIY Painting or Staining
Painting or staining your shaker cabinets yourself can save significant costs. Proper preparation is key to achieving a professional-looking finish. Careful attention to detail will yield impressive results.
Thorough preparation is paramount. Start by cleaning the cabinets thoroughly, removing any grease or grime. Then, lightly sand the surfaces to create a smooth base for the paint or stain. Apply a high-quality primer to ensure even coverage and prevent bleed-through. For painting, use multiple thin coats, allowing each coat to dry completely before applying the next.
For staining, apply stain according to the manufacturer’s instructions, wiping away any excess to prevent blotchiness. Finish with a clear sealant to protect the finish and enhance its durability.
Creative Design Ideas to Maximize Budget
Designing a budget-friendly shaker kitchen doesn’t mean sacrificing style or functionality. Clever planning and creative design choices can significantly reduce costs while achieving a beautiful and practical result. By strategically incorporating open shelving, maximizing storage within cabinets, and using cost-effective ways to add visual interest, you can create a stunning shaker kitchen without breaking the bank.
Open Shelving to Reduce Cabinetry
Open shelving is a fantastic way to reduce the overall number of cabinets needed, saving significantly on materials and installation costs. This approach also adds a touch of modern, airy appeal to the kitchen. Strategically placed open shelving can showcase your favorite dishes and cookbooks, acting as both storage and display. The following table illustrates a possible open shelving layout in a small kitchen:
| Area | Shelving Type | Purpose |
|---|---|---|
| Above Countertop | Three 12-inch deep shelves | Everyday dishes, spices, cookbooks |
| Above Sink | One 10-inch deep shelf | Soap dispenser, drying rack |
| Corner Space | Two angled shelves (10-inch deep) | Frequently used items, decorative pieces |
Maximizing Storage Space Within Shaker Cabinets
Shaker cabinets, with their simple design, offer excellent opportunities for creative storage solutions. Adding simple internal features can dramatically increase storage capacity without increasing the cabinet’s external dimensions.
Consider incorporating these ideas:
- Pull-out shelves and drawers: These maximize visibility and accessibility to items stored in deeper cabinets.
- Spice racks: Utilize vertical space efficiently with a dedicated spice rack.
- Drawer dividers: Keep drawers organized and prevent items from shifting around.
- Lazy Susans: Perfect for corner cabinets, allowing easy access to items stored in the back.
- Pot and pan organizers: Keep pots and pans neatly stacked and easily accessible.
Cost-Effective Ways to Add Visual Interest
Even with a limited budget, you can inject personality and visual appeal into your shaker cabinets. A few well-chosen additions can make a big difference.
Explore these budget-friendly options:
- Two-tone cabinets: Pairing a neutral base color with a contrasting accent color on the island or upper cabinets creates a striking visual effect without significantly increasing material costs.
- Simple molding: Adding simple decorative molding to cabinet frames adds architectural detail and elevates the overall look. Consider using readily available and affordable molding profiles.
- Statement hardware: While cabinets themselves might be simple, eye-catching hardware can dramatically enhance the overall aesthetic. Choose stylish knobs or pulls in a contrasting metal finish.
- Glass-front cabinets: Incorporating a few glass-front upper cabinets showcases your favorite dishes or glassware, adding a touch of elegance without needing extensive cabinet modifications.
Installation and DIY Options
Installing pre-made shaker cabinets can be a rewarding DIY project, saving you significant money compared to hiring professionals. However, it requires careful planning, patience, and some basic carpentry skills. This section Artikels the process, compares DIY versus professional installation costs, and lists the necessary tools and materials.Successfully installing shaker cabinets yourself hinges on accurate measurements, careful preparation, and following a methodical approach.
Budget-friendly shaker style kitchen cabinets offer a classic look without breaking the bank. To truly maximize your kitchen’s potential, however, clever design is key; check out this guide on how to design kitchen cabinets for maximizing storage space for smart storage solutions. Then, incorporate those space-saving ideas into your shaker style design for a beautiful and practical kitchen.
While seemingly daunting, breaking down the process into manageable steps makes the task achievable for many homeowners. The potential cost savings often outweigh the time investment, especially for smaller kitchens or those with basic carpentry experience.
Budget-friendly shaker style kitchen cabinets are a fantastic option for a stylish and functional kitchen. Choosing the right materials is key to both aesthetics and longevity, so check out this guide on best materials for kitchen cabinet doors durability and style to make an informed decision. This will help you create a stunning shaker kitchen without breaking the bank, ensuring your cabinets look great for years to come.
Pre-Made Shaker Cabinet Installation Steps
Installing pre-made cabinets involves several key steps. First, accurate wall measurements are crucial to ensure proper fitting and avoid costly mistakes. Next, you’ll need to prepare the wall by installing wall studs where necessary to provide secure mounting points for the cabinets. This may involve using shims to level uneven surfaces. Then, carefully follow the manufacturer’s instructions for assembling and hanging the base cabinets, followed by the wall cabinets.
Precise leveling and alignment are essential for a professional finish. Finally, you’ll install the cabinet doors and drawer fronts, ensuring proper alignment and functionality. Remember to always check for levelness at each stage.
Cost Comparison: DIY vs. Professional Installation
Professional installation costs vary widely depending on location, the size of the kitchen, and the complexity of the project. Expect to pay anywhere from $50 to $150 per cabinet for professional installation, or even more for specialized work. DIY installation, while requiring time and effort, significantly reduces these costs, with the primary expense being the materials themselves. For a kitchen with 20 cabinets, professional installation could cost between $1000 and $3000, while DIY could save you a substantial portion of that.
The savings make DIY a very attractive option for budget-conscious homeowners.
Essential Tools and Materials for DIY Installation
Before starting, gather the necessary tools and materials. This list is not exhaustive but covers the essentials. Having everything on hand beforehand will streamline the process and prevent delays.
- Stud finder: To locate wall studs for secure mounting.
- Level: For ensuring cabinets are perfectly level and plumb.
- Measuring tape and pencil: For accurate measurements and marking.
- Drill with various drill bits: For pilot holes and screwing.
- Screwdrivers (Phillips and flathead): For assembling and installing hardware.
- Shims: To level uneven walls and ensure proper cabinet alignment.
- Safety glasses and work gloves: To protect yourself from injury.
- Cabinet screws: Appropriate length and type for your cabinets and wall material.
- Caulk: To seal gaps between cabinets and walls.
Visual Inspiration: Budget Friendly Shaker Style Kitchen Cabinet Design Ideas
Let’s explore some inspiring kitchen designs featuring shaker cabinets to ignite your imagination and help you visualize your own budget-friendly shaker kitchen. These examples demonstrate how different color palettes, lighting choices, and design elements can dramatically alter the overall feel of the space.
Bright and Airy Kitchen with Light Shaker Cabinets
Imagine a kitchen bathed in natural light, where creamy white shaker cabinets reflect the sunshine and create a sense of spaciousness. The walls are painted a soft, pale gray, complementing the cabinets and adding a subtle contrast. The countertops are a light-colored quartz, mimicking the look of marble without the high cost. Recessed lighting throughout the kitchen provides even illumination, while a pendant light above the island adds a touch of warmth and style.
The overall effect is bright, airy, and inviting, perfect for a family home. A few pops of color, perhaps through brightly colored kitchen towels or a vibrant rug, add personality without overwhelming the light and airy theme.
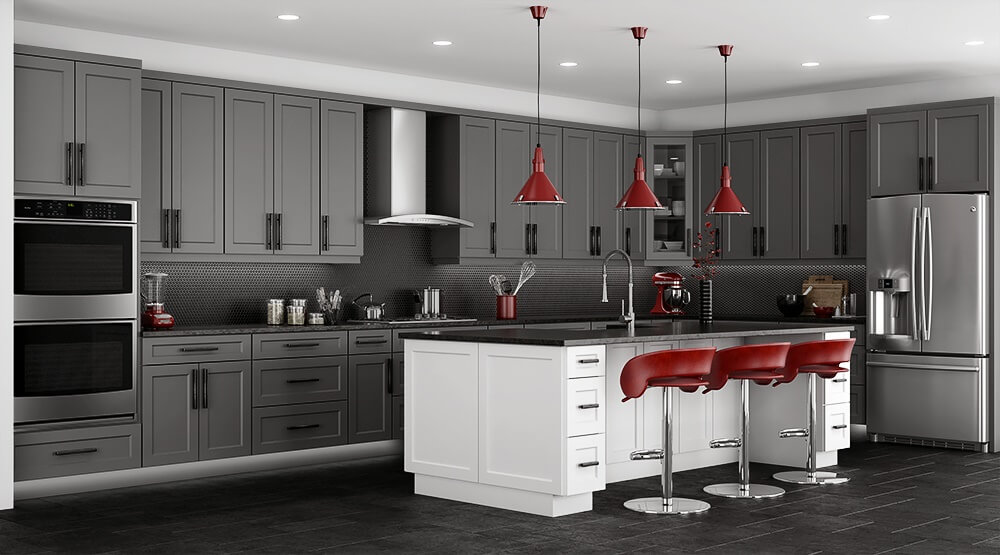
Sophisticated and Modern Kitchen with Dark Shaker Cabinets
In contrast to the bright and airy design, this kitchen embraces a sophisticated and modern aesthetic with dark-colored shaker cabinets, perhaps a deep navy or charcoal gray. These cabinets are paired with sleek, stainless steel appliances and light-colored quartz countertops, creating a striking contrast that enhances the modern feel. The backsplash is a simple, neutral tile, allowing the cabinets to be the focal point.
The lighting scheme uses a combination of under-cabinet lighting to illuminate the countertops and pendant lights over the island, creating a warm and inviting atmosphere without compromising the modern aesthetic. This design offers a dramatic and elegant look, perfect for a contemporary home.
Rustic and Charming Kitchen with Shaker Cabinets and Open Shelving
This design blends the clean lines of shaker cabinets with the rustic charm of open shelving, creating a warm and inviting atmosphere. A mix of light and dark wood tones in the cabinets and shelving adds visual interest and texture. The countertops are a butcher block style, adding to the rustic charm. Recessed lighting is combined with strategically placed spotlights to highlight the open shelving and display of decorative items.
A warm, neutral color palette, perhaps with beige or cream walls, enhances the rustic feel. This design offers a balance between modern practicality and rustic charm, perfect for a farmhouse-style home or anyone who appreciates a blend of styles.
Wrap-Up
Source: amazonaws.com
Designing a budget-friendly shaker style kitchen doesn’t mean sacrificing style or functionality. By carefully planning your layout, choosing cost-effective materials, and embracing DIY solutions, you can create a beautiful and efficient kitchen that reflects your personal style without overspending. Remember, the key is strategic planning and creative problem-solving. With a little ingenuity and this guide, you can achieve the shaker kitchen of your dreams, all while staying within your budget.
So, roll up your sleeves, get creative, and enjoy the rewarding process of building your perfect kitchen!
FAQ Summary
Can I mix and match shaker cabinet styles within the same kitchen?
Absolutely! Mixing different shaker door styles (e.g., raised panel, flat panel) can add visual interest and even help break up large expanses of cabinetry.
What are some good alternatives to wood for shaker cabinets?
MDF (medium-density fiberboard) is a popular and affordable alternative. Laminate and vinyl wraps are also cost-effective options that offer a variety of colors and finishes.
How much should I budget for cabinet hardware?
This depends on your style and choices, but you can find stylish and functional hardware for a reasonable price. Shop around and compare prices before making your selections.
Is it really possible to save money by installing cabinets myself?
Yes, DIY installation can significantly reduce costs, but be realistic about your skills and time commitment. If you’re unsure, consider hiring a professional for at least some parts of the installation.
How can I make my shaker cabinets look more expensive?
Adding crown molding, installing high-quality hardware, and choosing a sophisticated paint or stain color can elevate the look of your shaker cabinets.


