
Cabinet painting tips can transform your kitchen! From prepping surfaces and choosing the right paint to mastering application techniques and achieving a flawless finish, this guide covers everything you need to know. Whether you’re a seasoned DIYer or a complete novice, we’ll walk you through each step, ensuring your cabinets look professionally painted and last for years to come.
Get ready to refresh your space with stunning results!
Preparation: Cabinet Painting Tips
Getting your cabinets ready for a fresh coat of paint is crucial for a long-lasting, professional-looking finish. Proper preparation involves thorough cleaning, careful sanding, and the application of primer. Skipping these steps can lead to paint peeling, chipping, and an uneven final look. Let’s dive into the details.
Surface Cleaning
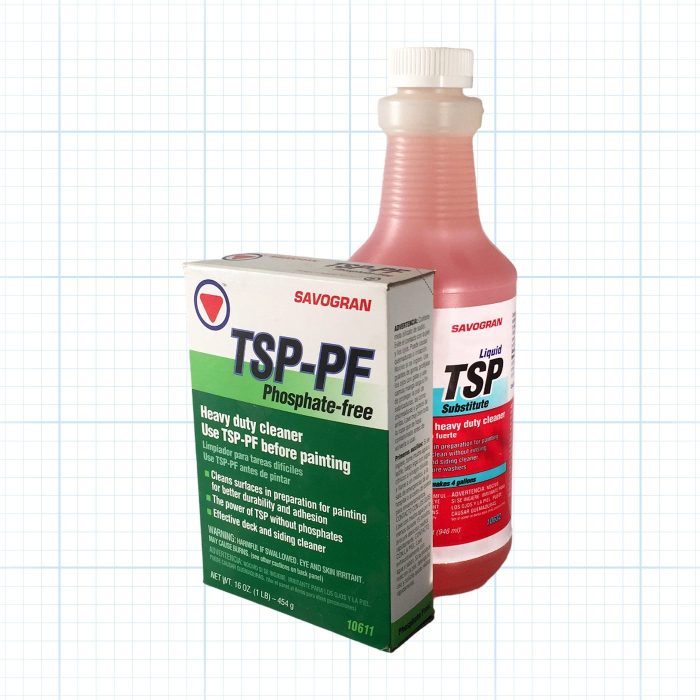
Thorough cleaning removes grease, grime, and any old finishes that could interfere with paint adhesion. Start by wiping down the cabinet surfaces with a damp cloth to remove loose dust and debris. For stubborn grease or grime, use a solution of warm water and a mild dish soap. Apply the solution with a soft sponge or cloth, scrubbing gently to avoid scratching the surface.
Rinse thoroughly with clean water and allow the cabinets to dry completely before proceeding. For particularly greasy areas, consider using a degreaser specifically designed for kitchen use, following the product’s instructions carefully. Ensure all surfaces are completely dry to prevent trapping moisture under the paint.
Sanding Techniques and Grit Levels
Sanding is essential for creating a smooth surface and ensuring proper paint adhesion. The grit level you choose depends on the condition of your cabinets and the type of finish they currently have. Higher grit numbers indicate finer sanding. Using the wrong grit can result in an uneven finish or leave scratches visible after painting.
Revamping your kitchen? Cabinet painting tips often focus on prep work, but don’t forget the overall design! If you’re considering a complete overhaul, check out these amazing Custom Closet Cabinets for inspiration, as they can influence your painting choices. Remember, the right paint color can dramatically enhance your new custom cabinetry, so plan accordingly!
| Grit Level | Use | Description | Example |
|---|---|---|---|
| 80-100 Grit | Removing old finishes, significant imperfections | Aggressive sanding for heavily damaged surfaces | Removing thick layers of old paint or varnish |
| 120-150 Grit | Smoothing surfaces after initial sanding | Intermediate sanding to remove scratches from coarser grits | Preparing surfaces after filling holes or removing imperfections |
| 180-220 Grit | Final sanding before priming | Fine sanding to create a smooth, even surface for paint | Creating a flawless base for primer and paint application |
Always sand in the direction of the wood grain to avoid creating scratches. Use a sanding block for a more even finish. After sanding, wipe down the cabinets with a tack cloth to remove all sanding dust.
Filling Imperfections
Before painting, fill any holes, scratches, or dents with wood filler. Choose a wood filler that matches the color of your cabinets as closely as possible. Apply the filler according to the manufacturer’s instructions, usually using a putty knife to pack it into the imperfection. Allow the filler to dry completely before sanding it smooth with progressively finer grits of sandpaper, starting with a coarser grit (e.g., 120 grit) and finishing with a finer grit (e.g., 220 grit).
Ensure the filled area is flush with the surrounding surface.
Primer Selection and Application
Primer is essential for ensuring paint adhesion and preventing the wood from showing through the final coat of paint, especially with darker colors. Different primers cater to various needs.
- Oil-based primers: Offer excellent adhesion and blocking properties, ideal for surfaces with stains or knots. They provide a durable base, but require more time to dry and need mineral spirits for cleanup.
- Water-based primers: Easier to clean up with soap and water, dry faster, and are low in VOCs (Volatile Organic Compounds). They are a good choice for most cabinet painting projects.
- Sheen primers: Primers with a slight sheen, such as satin or semi-gloss, can help to create a smoother surface and improve paint adhesion.
Apply the primer evenly with a brush, roller, or sprayer, following the manufacturer’s instructions. Allow the primer to dry completely before sanding lightly with fine-grit sandpaper (e.g., 220 grit) to create a perfectly smooth surface for the topcoat.
Paint Selection and Application
Choosing the right paint and applying it correctly are crucial for a professional-looking and long-lasting finish on your kitchen cabinets. The type of paint you select, along with your application method, will significantly impact the final result. This section will guide you through these important steps.
Revamping your kitchen? Cabinet painting tips can dramatically change the look, but if you’re considering a more significant upgrade, check out the options for Custom Kitchen Cabinets to see if they better suit your needs. Remember, proper prep work is key for a successful paint job, no matter the cabinet style.
Choosing the Right Paint Type for Kitchen Cabinets
Kitchen cabinets face daily wear and tear, requiring a durable and easy-to-clean paint. Two main contenders are latex and oil-based paints. Latex paints are water-based, offering several advantages. They are low-odor, easy to clean up with soap and water, and dry relatively quickly. However, they might not be as durable as oil-based paints in high-traffic areas.
Oil-based paints, conversely, offer superior durability and a harder, more resistant finish. However, they have a strong odor, require mineral spirits for cleanup, and take much longer to dry. For kitchen cabinets, a high-quality latex paint is often the preferred choice due to its ease of use and acceptable durability, especially with proper preparation and application. Oil-based paints are a more viable option in extremely high-use areas or if maximum durability is paramount, but the drawbacks must be considered.
Sheen Level Selection for Kitchen Cabinets
The sheen level of your paint significantly impacts both the look and durability of your cabinets. Different sheen levels offer varying degrees of glossiness and resistance to scratches and stains. Choosing the right sheen is a balance between aesthetics and practicality.
- Matte: Offers a flat, non-reflective finish. Hides imperfections well but is less durable and more prone to showing fingerprints and scratches.
- Eggshell: A slightly glossy finish that provides better durability than matte while still hiding minor imperfections. A popular choice for cabinets due to its balance of aesthetics and practicality.
- Satin: More durable and washable than eggshell, with a subtle sheen. A good choice for high-traffic areas.
- Semi-Gloss: Very durable and easy to clean, with a noticeable sheen. Excellent for areas prone to moisture or frequent cleaning, but imperfections will be more visible.
- Gloss: The highest sheen, offering maximum durability and washability. Shows imperfections most readily, making it less suitable for cabinets unless perfectly prepped.
Paint Application Methods
Several methods exist for applying paint to kitchen cabinets: brushing, rolling, and spraying. Each has its advantages and disadvantages.
| Method | Advantages | Disadvantages | Best For |
|---|---|---|---|
| Brush | Precise control, good for detail work, suitable for all paint types | Labor-intensive, can leave brush strokes, slower application | Detailed trim, corners, and hard-to-reach areas |
| Roller | Fast coverage, even finish on large surfaces | Less control than brushing, may leave roller marks, not ideal for detailed areas | Large flat surfaces of cabinet doors and panels |
| Sprayer | Fastest application, very smooth finish | Requires specialized equipment, potential for overspray, may require more preparation to prevent drips | Large projects, achieving a professional-looking finish efficiently |
Thin Coats and Drying Times
Applying thin coats is crucial for preventing drips, runs, and ensuring proper adhesion. Thick coats are more likely to sag or wrinkle. Always allow adequate drying time between coats, as specified by the paint manufacturer. This usually involves allowing each coat to dry completely before applying the next one. Forcing the process by applying a new coat too soon can lead to peeling and other issues.
Proper drying times ensure the paint bonds correctly and results in a more durable finish.
Advanced Techniques and Finishes
Taking your cabinet painting project to the next level involves mastering some advanced techniques and exploring different finishes. This section will cover creating a two-tone effect, achieving a flawlessly smooth finish, painting doors and drawers separately, and properly handling cabinet hardware. These techniques will help you achieve professional-looking results that significantly enhance the aesthetic appeal of your kitchen or bathroom.
Creating a Two-Tone or Distressed Cabinet Finish
Achieving a two-tone or distressed finish adds depth and character to your cabinets. A two-tone finish involves painting different sections of the cabinets in contrasting colors, while a distressed finish creates a worn, antique look. Both can dramatically transform the appearance of your cabinets.
- Preparation: Thoroughly clean and sand the cabinet surfaces. For a two-tone finish, carefully mask off the areas you want to keep a different color using painter’s tape and a drop cloth to protect surrounding areas. For a distressed look, consider lightly sanding existing paint to create a base for the distressed effect.
- Base Coat: Apply a high-quality primer, followed by at least two coats of your chosen base color, allowing each coat to dry completely. This ensures even coverage and optimal adhesion for the second color.
- Second Color Application (Two-Tone): Once the base coat is dry, carefully apply painter’s tape to define the areas you want to paint with the second color. Apply two coats of your chosen second color, ensuring a smooth, even finish. Carefully remove the tape while the paint is still slightly wet to prevent pulling up the dried paint.
- Distressing Technique: For a distressed look, after the base coat is dry, apply a second coat of a contrasting color. While the second coat is still slightly wet, use fine-grit sandpaper (220-grit or higher) to gently sand away portions of the top coat, revealing the base color beneath. Focus on edges, corners, and raised areas to create a naturally worn appearance.
You can control the level of distressing by adjusting the amount of sanding.
- Sealing: Once you’re satisfied with the finish, apply a clear sealant to protect the paint and enhance its durability.
Achieving a Smooth, Professional-Looking Finish
Avoiding common painting mistakes is crucial for a smooth, professional finish. Uneven application, drips, and brushstrokes can detract from the overall look.
- Use high-quality paint and brushes designed for cabinet painting. This will contribute to a smoother application and minimize brush marks.
- Apply thin, even coats, allowing each coat to dry completely before applying the next. Multiple thin coats are far superior to one thick coat, which is more likely to drip and run.
- Use a high-quality primer to create a smooth surface and ensure proper paint adhesion. Primer helps to seal the wood and prevents the absorption of paint, leading to a more even finish.
- Sand lightly between coats with fine-grit sandpaper (220-grit or higher) to remove any imperfections before applying the next coat. This helps to create a flawless surface.
- Work in a well-ventilated area and maintain consistent temperature and humidity levels during the painting process. Extreme temperatures or humidity can affect paint drying and the overall finish.
Painting Cabinet Doors and Drawers Separately
Painting cabinet doors and drawers separately allows for better control, even coverage, and easier handling.This method prevents drips and ensures a consistent finish on all surfaces. Proper preparation and a systematic approach are key to success.
- Preparation: Remove all doors and drawers. Clean and sand all surfaces thoroughly. Remove all existing hardware (knobs, pulls, hinges).
- Priming: Apply a high-quality primer to all surfaces. Allow it to dry completely according to the manufacturer’s instructions.
- Painting: Apply two or three thin coats of paint to each piece, allowing each coat to dry completely before applying the next. For larger surfaces, consider using a paint sprayer for an even finish.
- Drying: Allow the paint to dry completely before reinstalling the hardware and attaching the doors and drawers to the cabinets.
Handling Cabinet Hardware
Properly handling cabinet hardware is essential to protect it from paint and ensure a seamless reinstallation.
- Removal: Carefully remove all knobs, pulls, and hinges. Use a screwdriver or other appropriate tool, and label each piece to ensure easy reinstallation.
- Protection (In-Place): If you choose to leave the hardware in place, thoroughly mask it off with painter’s tape and plastic sheeting to protect it from paint splatters and drips.
- Reinstallation: Once the paint is completely dry, carefully remove any masking tape and reinstall the hardware. Use the labels to ensure everything goes back in the correct place.
Visual Aids and Descriptions
Source: familyhandyman.com
Revitalizing your kitchen? Cabinet painting tips can make a huge difference, especially if you’re working with older pieces. If you’re aiming for a specific look, consider the unique charm of Vintage cabinets , as their style can influence your paint color and finish choices. Remember proper prep work is key before you even think about picking up a brush for a professional-looking finish on your cabinets.
Preparing your cabinets for painting and understanding paint properties are crucial for a professional-looking finish. Visualizing these aspects will greatly improve your results. This section provides detailed descriptions to guide you through the process.
Prepared Cabinet Surface
A properly prepared cabinet surface should be smooth, clean, and uniformly colored. The texture should be even, free of any significant bumps, scratches, or imperfections. Any previous finish should be completely removed, revealing the bare wood or a uniformly primed surface. The color should be consistent across the entire surface, typically a light, neutral shade if using a primer.
Giving your cabinets a fresh coat of paint can dramatically update your kitchen. If you’re working with Traditional cabinets , remember to prep the surface well before painting, paying special attention to any intricate details. Proper preparation, like sanding and priming, is key to achieving a professional-looking finish that will last. Choosing the right paint type is also crucial for a durable and beautiful result.
There should be no dust, grease, or other debris visible. Imagine a perfectly smooth, lightly colored canvas ready for painting. This even surface ensures the paint adheres properly and produces a flawless finish.
Ideal Paint Consistency
The ideal paint consistency for application should be smooth and creamy, not too thick or too thin. Too thick, and it will be difficult to spread evenly, leading to brushstrokes and uneven coverage. Too thin, and it will require multiple coats, increasing drying time and potentially compromising the final finish. The paint should flow smoothly off the brush or roller without dripping excessively.
If the paint is too thick, add a small amount of paint thinner or water (depending on the type of paint) and stir thoroughly. If it’s too thin, let it sit for a short while or add a small amount of paint extender to increase its viscosity. The goal is to achieve a consistency that allows for even application with minimal effort.
Paint Sheen Levels
Different sheen levels offer varying degrees of light reflection and durability. Matte paint has virtually no sheen, appearing almost flat and absorbing most light. Eggshell has a slightly more reflective surface, resembling the sheen of an eggshell. Satin paint has a noticeable sheen with a smooth, slightly glossy appearance. Semi-gloss paint has a significant sheen, reflecting more light and offering better durability and cleanability.
Revamping your office? Cabinet painting tips can really transform the space, especially if you’re working with modern styles. For a sleek, updated look, consider incorporating high-quality pieces like those from Modern Office Cabinets , then personalize them with a fresh coat of paint. Remember proper prep work is key for a long-lasting, professional-looking finish on your painted cabinets.
Gloss paint has the highest sheen, reflecting a significant amount of light and offering the best durability and washability. Imagine comparing a matte black wall (absorbing light) to a glossy black piano (reflecting light); that contrast illustrates the differences in sheen levels. The choice of sheen depends on personal preference and the area being painted, with higher sheens typically preferred for high-traffic areas.
Proper and Improper Paint Application, Cabinet painting tips
Proper paint application involves even, smooth strokes that overlap slightly to avoid streaks or missed areas. Brushstrokes should be consistent and follow the grain of the wood (if applicable), blending smoothly into adjacent areas. The paint should be applied in thin, even coats, allowing each coat to dry completely before applying the next. Improper application, on the other hand, results in visible brushstrokes, uneven coverage, drips, and runs.
Imagine a perfectly smooth, evenly colored surface versus one with streaks, visible brush marks, and uneven patches; this contrast clearly illustrates the difference between proper and improper techniques. Consistent, light pressure and careful blending are key to achieving a professional finish.
Final Summary
Updating your kitchen cabinets with a fresh coat of paint is a rewarding project that can dramatically improve your home’s aesthetic appeal. By following these cabinet painting tips, from careful preparation to meticulous application, you can achieve a professional-looking finish that will enhance your kitchen’s beauty and value. Remember, patience and attention to detail are key to success! Now go forth and paint!
Quick FAQs
Can I paint over existing varnish or lacquer?
Yes, but proper preparation is crucial. You’ll need to thoroughly clean the surface, sand it to create a tooth for the paint to adhere to, and possibly use a primer designed for glossy surfaces.
How long should I wait between coats of paint?
Follow the manufacturer’s instructions on the paint can. Generally, you should allow at least 2-4 hours of drying time between coats, depending on the type of paint, temperature, and humidity.
What’s the best way to clean paint brushes after use?
Immediately clean brushes with the appropriate solvent (water for water-based paints, mineral spirits for oil-based paints). Rinse thoroughly and reshape the bristles before storing.
What should I do if I get paint drips or runs?
Work quickly and in thin coats to minimize drips. If drips occur, let them dry completely and then carefully sand them smooth before applying another coat.
How do I deal with stubborn stains or imperfections?
Use a wood filler to repair holes and scratches. Sand smooth after drying and apply primer before painting.


