
How to install smart lighting without professional electrician – How to install smart lighting without a professional electrician? It’s easier than you think! This guide empowers you to illuminate your home with the convenience and energy efficiency of smart lighting, all without needing to call in a professional. We’ll walk you through selecting the right system, safely installing smart bulbs and switches, and troubleshooting any hiccups along the way.
Get ready to transform your home lighting and enjoy the smart home experience.
From understanding the different types of smart lighting systems (Wi-Fi, Zigbee, Z-Wave) and their components to safely assessing your home’s electrical system and choosing the right wattage, we’ll cover everything you need to know. We’ll provide detailed, step-by-step instructions for installing both smart bulbs and switches, including safety precautions and troubleshooting tips. Whether you’re a DIY enthusiast or a complete beginner, this guide will give you the confidence to tackle this project yourself.
Understanding Smart Lighting Systems
Smart lighting has revolutionized home automation, offering convenience, energy efficiency, and aesthetic control. Understanding the different systems and their components is crucial for a successful DIY installation. This section will break down the key aspects of smart lighting technology, allowing you to make informed decisions for your home.
Types of Smart Lighting Systems
Smart lighting systems primarily differ in the communication protocols they use. Each protocol has its strengths and weaknesses, influencing factors like range, reliability, and compatibility. The most common protocols are Wi-Fi, Zigbee, and Z-Wave.
- Wi-Fi: Wi-Fi-based smart bulbs connect directly to your home’s Wi-Fi network. This simplifies setup as it doesn’t require a separate hub. However, Wi-Fi can be less reliable than other protocols due to potential network congestion and interference.
- Zigbee: Zigbee uses a mesh network, meaning each bulb can act as a repeater, extending the range and reliability of the network. This is particularly useful in larger homes. Zigbee typically requires a hub, which acts as a central controller.
- Z-Wave: Similar to Zigbee, Z-Wave also uses a mesh network for improved range and reliability. It’s known for its strong security features and is often used in more complex home automation systems. Like Zigbee, it usually requires a hub.
Components of a Smart Lighting Setup
A typical smart lighting setup comprises several key components working together. The specific components you’ll need depend on the chosen system and desired level of control.
- Smart Bulbs: These are the core of the system, replacing traditional light bulbs with smart capabilities. They come in various shapes, sizes, and color temperatures.
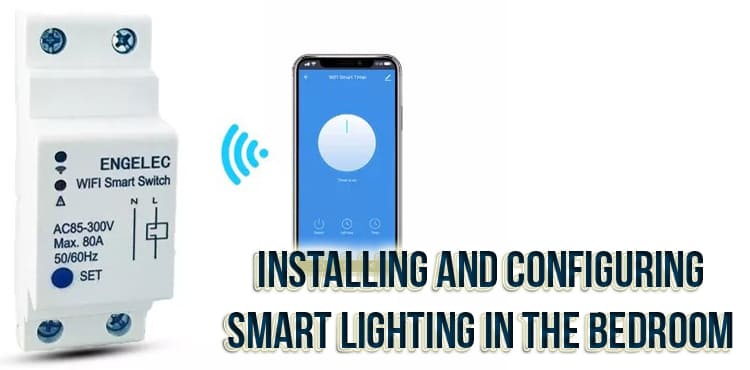
- Smart Switches: These switches replace your existing light switches, offering app-based control and often additional features like scheduling and automation. They can work independently or integrate with a smart home system.
- Hubs (for Zigbee and Z-Wave): A hub acts as a central controller, connecting your smart bulbs and other devices to your home network and enabling communication between them. Wi-Fi systems typically don’t require a separate hub.
- Smart Plugs: These allow you to control any existing lamp or appliance, turning them into smart devices. They are often a cost-effective way to add smart control to non-smart lighting.
Comparison of Smart Lighting Technologies
Choosing the right technology depends on your specific needs and priorities. Consider the following comparison:
| Feature | Wi-Fi | Zigbee | Z-Wave |
|---|---|---|---|
| Setup Complexity | Easy | Moderate | Moderate |
| Range | Limited | Excellent | Excellent |
| Reliability | Moderate | Excellent | Excellent |
| Cost | Generally Lower | Moderate | Higher |
| Security | Moderate | Good | Excellent |
| Compatibility | Can be limited | Widely compatible within Zigbee ecosystem | Widely compatible within Z-Wave ecosystem |
Assessing Your Home’s Electrical System
Before you start screwing in smart bulbs, it’s crucial to understand your home’s electrical setup. Knowing your wiring and available circuits is vital for a safe and successful smart lighting installation. Improper installation can lead to blown fuses, tripped breakers, or even worse – electrical fires. This section will guide you through assessing your home’s electrical system to ensure a smooth and safe installation.Understanding your home’s existing wiring and its compatibility with smart lighting is the first step.
Smart bulbs, switches, and other smart lighting components operate on standard household voltage (typically 120V in North America and 230V in many other parts of the world). However, the type of wiring and the capacity of your circuits will determine how many smart lights you can safely install in a particular area. Older homes might have different wiring configurations than newer ones, impacting your choices.
Identifying Existing Wiring and Compatibility
Identifying your home’s wiring type isn’t typically something you can do without specialized tools and some knowledge. However, you can get a general idea. For example, if your home is relatively new (built within the last 20-30 years), it’s likely to have modern wiring capable of handling the demands of smart lighting. Older homes, however, may have older wiring that needs to be considered before adding smart lights.
Installing smart lighting yourself is surprisingly easy; many kits offer straightforward instructions. It’s a much simpler process than, say, the process of obtaining a South Korean driver’s license for foreigners , which involves several steps and paperwork. Once you’ve got your smart bulbs, connecting them to your home network is usually a quick and intuitive process, letting you control your lighting with your phone or voice assistant.
If you’re unsure, it’s always best to consult a qualified electrician. They can assess the condition of your wiring and advise on the best approach for installing smart lighting. They can also identify any potential issues before they become problems.
Safely Checking Your Circuit Breaker Box and Identifying Available Circuits
Your circuit breaker box is the central control panel for your home’s electrical system. Before installing any smart lighting, carefully locate your circuit breaker box (usually found in a basement, garage, or utility closet). Turn off the power to the circuit you plan to work on by flipping the corresponding breaker switch to the “off” position. This is a critical safety step to prevent electric shock.
Identifying which circuit controls the lights in the area where you plan to install smart bulbs is important. You can usually do this by turning off breakers one by one and observing which lights go out. Remember to carefully label each breaker once you’ve identified its function. This will be extremely helpful for future maintenance and troubleshooting.
Never work with electricity if you’re not comfortable doing so; consult a qualified electrician if you are unsure about any step.
Installing smart lighting yourself can save you money, especially if you’re on a budget. Consider the costs involved; for example, check out this article on average monthly expenses for a single person living in a South Korean city to see how much you might save by doing it yourself. This can help you prioritize home improvements, like upgrading to energy-efficient smart lighting, which can lower your electricity bill in the long run.
Determining Appropriate Wattage for Smart Bulbs and Fixtures
Smart bulbs, like traditional incandescent bulbs, have wattage ratings. The wattage indicates the amount of power the bulb consumes. Exceeding the maximum wattage rating for a light fixture can lead to overheating and potential fire hazards. Always check the light fixture’s label or manufacturer’s specifications for the maximum wattage it can safely handle. For example, a fixture might specify a maximum wattage of 60W.
If you choose a smart bulb with a higher wattage, you risk exceeding the fixture’s capacity. Most smart bulbs have their wattage clearly stated on the packaging. When in doubt, choose a lower wattage bulb to stay within the safe operating limits of your fixtures.
Installing Smart Bulbs
Replacing your traditional light bulbs with smart bulbs is a straightforward process that can significantly enhance your home’s lighting control and efficiency. This section provides a step-by-step guide, along with information on connecting your new bulbs to your Wi-Fi network and addressing potential issues.
Smart Bulb Installation Steps
Before beginning, ensure you have the correct type of smart bulb for your existing light fixtures and that your home’s Wi-Fi network is functioning correctly. Always turn off the power to the light fixture at the breaker box before handling any electrical components. This is crucial for your safety.
- Turn off the power: Locate the circuit breaker controlling the light fixture you’re working on and switch it to the “off” position. This prevents electrical shock.
- Remove the old bulb: Carefully unscrew your existing light bulb and set it aside. Be mindful of any heat remaining from the bulb.
- Install the smart bulb: Carefully screw in your new smart bulb, ensuring it’s firmly seated. Do not overtighten.
- Turn the power back on: Switch the circuit breaker back to the “on” position. Your smart bulb should now illuminate.
- Connect to Wi-Fi: Most smart bulbs require a smartphone app for setup. Download the manufacturer’s app and follow the on-screen instructions to connect the bulb to your home’s Wi-Fi network. This usually involves selecting your Wi-Fi network and entering your password. The app will guide you through the process.
Connecting Smart Bulbs to Wi-Fi
Connecting your smart bulbs to your Wi-Fi network is essential for controlling them remotely and utilizing their smart features. The process varies slightly depending on the brand and model of your smart bulb, but generally involves downloading a dedicated app, creating an account (if necessary), and following the in-app instructions. Most apps provide clear visual guidance and troubleshooting steps.
If you encounter issues, refer to the manufacturer’s website or support documentation for assistance. Sometimes, restarting your router or placing the bulb closer to the router during initial setup can resolve connection problems.
Smart Bulb Installation Comparison, How to install smart lighting without professional electrician
Different smart bulbs use various sockets, leading to variations in the installation process. The following table Artikels these differences:
| Bulb Type | Installation Steps | Compatibility | Troubleshooting |
|---|---|---|---|
| Standard Screw-in (E26/E27) | Unscrew old bulb, screw in smart bulb. | Most standard lamps and fixtures. | Check bulb is tightly screwed in; ensure power is on. |
| GU10 | Twist and release the old bulb, insert and twist the new bulb. | Recessed lighting fixtures, spotlights. | Ensure correct orientation; try a different fixture if issues persist. |
| BR30 | Similar to screw-in bulbs, but larger size. | Larger recessed lighting fixtures. | Check for proper seating; verify fixture compatibility. |
| MR16 | Typically requires a specific fitting; may involve some manipulation. | Low-voltage track lighting. | Consult manufacturer instructions; ensure correct voltage. |
Installing Smart Switches
Upgrading your home’s lighting with smart switches offers significant convenience and energy-saving potential. This process involves replacing your existing light switches with smart versions, allowing you to control your lights remotely via smartphone apps or voice assistants. While seemingly straightforward, it’s crucial to understand the different types of switches and wiring configurations to ensure a safe and successful installation.
Single-Pole vs. Three-Way Smart Switches
Smart switches come in various configurations, the most common being single-pole and three-way switches. A single-pole switch controls a light fixture from one location. A three-way switch, however, allows control of a light fixture from two different locations (e.g., at the top and bottom of a staircase). The wiring and installation process differ slightly between these two types.
Choosing the correct switch type is paramount for proper functionality. Incorrectly installing a three-way switch where a single-pole is needed will result in a malfunctioning light.
Wiring a Single-Pole Smart Switch
Before beginning any electrical work, always turn off the power to the circuit at the breaker box. This is a critical safety precaution to prevent electric shock. Verify the power is off using a non-contact voltage tester.
- Remove the Existing Switch Plate and Switch: Carefully remove the screws holding the switch plate in place. Then, remove the screws securing the old switch to the electrical box. Gently pull the switch away from the wall, taking note of the wire connections.
- Identify the Wires: You’ll typically find two wires connected to a single-pole switch: a black (hot) wire and a white (neutral) wire. A bare copper or green wire may also be present; this is the ground wire. Take a clear picture of the wiring configuration before disconnecting anything, just in case you forget.
- Disconnect the Wires: Carefully loosen the screws holding the wires to the old switch and disconnect them one by one. Note the position of each wire on the switch before disconnecting it.
- Connect the Wires to the Smart Switch: The smart switch will have clearly marked terminals for the black, white, and ground wires. Connect the wires to the corresponding terminals on the smart switch, ensuring they are securely fastened. The process is similar to connecting the wires to the old switch, only the smart switch may have different terminal designations.
- Secure the Smart Switch: Carefully tuck the wires into the electrical box, ensuring they are not pinched or damaged. Then, mount the smart switch to the electrical box using the screws provided.
- Attach the Switch Plate: Attach the switch plate to the smart switch using the screws.
- Restore Power and Test: Turn the power back on at the breaker box. Test the smart switch to ensure it functions correctly. Use your smartphone app to verify the connection and control the light.
Always consult the specific instructions provided with your smart switch, as wiring diagrams and connection methods can vary slightly between brands and models.
Installing a Three-Way Smart Switch
Installing a three-way smart switch is more complex than installing a single-pole switch due to the additional wiring involved. It requires a basic understanding of electrical wiring and may involve working with multiple switches and traveler wires. If you’re uncomfortable with this level of electrical work, it is best to consult a qualified electrician. The process involves identifying the traveler wires, which carry the signal between the two three-way switches, and connecting them correctly to the smart switches.
Detailed instructions are usually included with the specific smart switch kit. Incorrect wiring can lead to a malfunctioning light or even electrical hazards.
Setting up a Smart Lighting Hub (if applicable): How To Install Smart Lighting Without Professional Electrician
Source: alltroubleshooting.net
Many smart lighting systems require a central hub to coordinate and control your lights. This hub acts as a bridge between your lights and your smartphone, allowing for centralized control and advanced features like automation and scheduling. While some smart bulbs work independently, a hub often unlocks the full potential of your smart lighting setup.Setting up a smart home hub usually involves connecting it to your home Wi-Fi network and then downloading and installing the manufacturer’s app on your smartphone or tablet.
The specific steps will vary depending on the brand and model of your hub, but the general process is fairly straightforward. Most hubs guide you through the setup process with clear on-screen instructions.
Adding Smart Lighting Devices to the Hub
After successfully setting up your hub, the next step is to add your individual smart lights. This typically involves placing the light into pairing mode (often a sequence of on/off button presses) and then selecting “Add Device” or a similar option within the hub’s app. The app will scan for nearby devices, and once it finds your light, you’ll be prompted to confirm its inclusion in your system.
You will then usually need to assign the light to a room or location within the app to help organize your smart home. For example, Philips Hue uses a straightforward process where you select “Add light” in the app and follow the instructions on the screen to connect the light to the Hue bridge.
Configuring Scenes and Automation Rules
Smart lighting hubs allow for advanced customization through the creation of scenes and automation rules. Scenes are pre-programmed lighting configurations that can be activated with a single tap in the app. For instance, you could create a “Movie Night” scene that dims the lights to a low, warm setting, or a “Wake Up” scene that gradually brightens the lights to simulate a sunrise.Creating automation rules involves setting conditions and actions.
A common example is setting a rule to automatically turn on the lights at sunset and turn them off at sunrise. This could be triggered by the hub’s time and location settings or integrated with other smart home devices, such as motion sensors. Many hubs offer a range of triggers and actions, allowing for highly personalized automation. For example, the Samsung SmartThings app allows you to create automations based on time, location, device status, and even weather conditions.
You might set a rule to turn on porch lights when motion is detected by a sensor after sunset, or to turn off all lights when you leave home, as detected by your smartphone’s location.
Troubleshooting Common Issues
Even with careful installation, smart lighting systems can sometimes present challenges. This section Artikels common problems and provides solutions to get your smart lighting working smoothly. Understanding the potential issues beforehand can save you time and frustration.
Troubleshooting smart lighting often involves systematically checking different components and connections. Remember to always turn off the power at the breaker before working with any electrical wiring.
Connectivity Problems
Connectivity issues are among the most frequent problems encountered. These can range from a bulb failing to connect to your Wi-Fi network to the entire system becoming unresponsive. Several factors can contribute to this, including weak Wi-Fi signals, network congestion, and incorrect network settings on the smart bulb or switch.
Solutions involve verifying your Wi-Fi network strength near the light fixture, restarting your router and smart devices, ensuring your smartphone or tablet is connected to the same Wi-Fi network, and checking for any conflicting network names or passwords. Sometimes, simply moving the light fixture closer to your router can resolve the issue. If you’re using a smart hub, ensure it’s properly connected to your internet and that the firmware is up-to-date.
Flickering Lights
Flickering lights are another common issue. This can stem from several causes, including loose wiring, incompatible bulbs, or interference from other electrical devices. Incorrectly wired smart switches can also cause flickering.
Troubleshooting flickering lights begins with checking the wiring connections at both the light fixture and the switch. Ensure all connections are secure and that there’s no damage to the wiring. Try replacing the bulb with a known good one to rule out a faulty bulb. If the flickering persists, it might indicate a problem with the smart switch itself or a more significant electrical issue requiring professional assistance.
Lights Not Responding to Commands
Sometimes, your smart lights might simply fail to respond to commands from your smartphone app or voice assistant. This could be due to a software glitch in the app, a problem with the smart hub (if applicable), or a malfunctioning smart bulb or switch.
Restarting the app, your phone, and the smart lighting devices is a good first step. Check the app for any software updates and ensure your smart hub (if used) is functioning correctly and connected to the internet. If a specific light isn’t responding, try resetting it to factory settings and re-pairing it with your system. If the problem continues after trying these steps, consider contacting the manufacturer’s customer support.
Installing smart lighting yourself is surprisingly easy; many kits offer straightforward instructions. Before you get started, though, you’ll want to find a suitable place to live, and if you’re an expat considering South Korea, check out this helpful guide on finding affordable long-term rentals in South Korea for expats to ensure you have the right space for your new smart home setup.
Once you’re settled, you can easily personalize your lighting with various smart bulbs and switches.
Troubleshooting Flowchart
The following flowchart provides a structured approach to troubleshooting common smart lighting problems:
[Imagine a flowchart here. The flowchart would start with a central box labeled “Smart Lighting Problem?”. Branches would lead to boxes representing common problems (Connectivity Issues, Flickering Lights, Lights Not Responding). Each of these boxes would then branch to further troubleshooting steps (Check Wi-Fi signal, Check wiring, Restart devices, etc.), ultimately leading to either a “Problem Solved” or “Seek Professional Help” end point.]
Safety Precautions
Working with electricity, even for seemingly simple tasks like installing smart lighting, carries inherent risks. Understanding and implementing proper safety measures is crucial to prevent injury or damage to your home. Ignoring safety protocols can lead to electric shock, fires, and other serious consequences. This section details essential safety practices to ensure a safe and successful smart lighting installation.Prioritizing safety involves more than just being careful; it requires a systematic approach to minimize potential hazards.
This includes careful planning, the use of appropriate tools, and a thorough understanding of your home’s electrical system. Remember, it’s always better to err on the side of caution when dealing with electricity.
Turning Off the Power
Before undertaking any electrical work, always turn off the power to the circuit you’ll be working on. This is the single most important safety precaution. Locate your breaker box and identify the circuit controlling the lights you’re installing. Turn the corresponding breaker completely off. After switching off the breaker, use a non-contact voltage tester to verify that the power is indeed off at the light fixture or switch location.
This extra step provides confirmation and prevents accidental shocks. Never rely solely on the breaker switch; always double-check.
Using a Non-Contact Voltage Tester
A non-contact voltage tester is an indispensable tool for anyone working with electricity. This device detects the presence of voltage without requiring physical contact with the wires. It’s a simple, handheld device with a sensor that lights up or beeps when it detects a live wire. Before touching any wires or electrical components, use the tester to ensure that the power is completely off.
The tester provides immediate visual or auditory feedback, alerting you to any potential hazards. Regularly check the tester’s batteries to ensure it’s functioning correctly. A malfunctioning tester could lead to a false sense of security.
Other Safety Equipment
While a non-contact voltage tester is essential, other safety equipment can further enhance your protection. Insulated tools, such as screwdrivers and pliers with insulated handles, prevent accidental shocks by providing an extra layer of protection. Safety glasses should always be worn to protect your eyes from potential debris or sparks. If working at heights, use a stable ladder and follow safe ladder practices.
Rubber gloves can offer additional protection, but they should be used in conjunction with other safety measures, not as a sole reliance. Remember, multiple layers of protection are always better than relying on a single measure.
Choosing the Right Smart Lighting System
Source: ytimg.com
Selecting the perfect smart lighting system can feel overwhelming with so many brands and features available. This section will help you navigate the choices, considering your budget, home setup, and desired functionality to find the best fit for your needs. We’ll compare popular brands and highlight key factors to ensure a smooth and successful smart home lighting installation.Choosing a smart lighting system involves several crucial considerations.
Your budget will significantly impact the options available to you, from individual smart bulbs to comprehensive systems with hubs and advanced features. Compatibility with your existing devices and systems (like smart assistants or home automation platforms) is also vital for seamless integration. Finally, consider the features you actually need – do you want color-changing capabilities, scheduling options, or integration with other smart home devices?
Installing smart lighting yourself is totally doable; many helpful guides are online. If you’re looking for extra cash to fund your home improvement projects, check out this resource on options for finding part-time jobs in South Korea for foreigners – it might help you earn some extra money. Then, once you have the funds, you can easily finish setting up your new smart lighting system.
Remember to always prioritize safety when working with electricity.
Don’t get caught up in unnecessary bells and whistles if they don’t align with your usage.
Smart Lighting Brand Comparison
Several prominent brands dominate the smart lighting market, each offering unique features and price points. Understanding their strengths and weaknesses will help you make an informed decision. The following brands represent a good cross-section of the market, showcasing a range of options.
- Philips Hue: Known for its extensive color range, reliable performance, and broad ecosystem integration with various smart home platforms. A higher initial investment is often required, but the robust system and wide range of accessories justify the cost for many users. Their bulbs offer excellent color accuracy and brightness.
- LifX: Offers Wi-Fi-enabled bulbs, eliminating the need for a separate hub. This simplifies setup but can sometimes lead to network congestion with many bulbs. LifX provides a good balance between features and price, offering color-changing options and various form factors.
- IKEA Trådfri: A budget-friendly option with a good range of bulbs, switches, and other accessories. While offering fewer features than premium brands, Trådfri provides a solid entry point into smart lighting, particularly for those seeking affordable and reliable solutions. The system’s simplicity makes it ideal for beginners.
- TP-Link Kasa: This brand provides a cost-effective solution focusing on functionality and ease of use. While lacking the extensive color options of some competitors, Kasa’s smart bulbs and switches offer reliable performance and straightforward setup through their app.
- Nanoleaf: Nanoleaf stands out with its unique shapes and panels that allow for creative lighting designs beyond standard bulbs. While pricier, they offer a visually appealing and customizable lighting experience, often used as ambient or accent lighting.
Factors to Consider When Choosing a Smart Lighting System
Beyond individual brands, several overarching factors influence the optimal choice for your smart lighting system.
- Budget: Smart lighting costs can range significantly, from a few dollars per bulb to hundreds for a complete system. Determine your budget beforehand to narrow your options effectively.
- Compatibility: Ensure compatibility with your existing smart home ecosystem (Amazon Alexa, Google Assistant, Apple HomeKit, etc.) and your home’s Wi-Fi network. Some systems require a hub, while others utilize Wi-Fi directly.
- Features: Consider your desired functionality. Do you need color-changing capabilities, scheduling options, dimming, or integration with other smart home devices? Prioritize features that align with your needs and usage patterns. Avoid paying extra for features you won’t use.
- Ease of Use: Choose a system with a user-friendly app and straightforward setup process. Consider the system’s responsiveness and reliability in everyday use.
- Scalability: Think about future expansion. Can the system easily accommodate additional bulbs and accessories as your needs grow?
Conclusive Thoughts
Installing smart lighting yourself can be a rewarding experience, offering both cost savings and the satisfaction of a job well done. By following the steps Artikeld in this guide, you’ve gained the knowledge and skills to upgrade your home’s lighting to a smarter, more efficient, and personalized system. Remember to prioritize safety and always double-check your work. Now go forth and illuminate!
Question & Answer Hub
What if I don’t have a neutral wire?
Some smart switches require a neutral wire. If you lack one, you may need to consider smart bulbs instead or consult a qualified electrician to determine your options.
Can I mix and match different smart lighting brands?
Generally, it’s best to stick with one brand or ecosystem for seamless integration and control. Mixing brands can lead to compatibility issues.
How often should I replace my smart bulbs?
Smart bulbs have a lifespan similar to traditional LED bulbs, typically lasting several years. However, the actual lifespan can vary depending on usage and bulb quality.
My smart lights are flickering. What should I do?
Flickering can indicate loose connections, a faulty bulb, or compatibility issues. Check all connections, try a different bulb, and ensure your system is properly configured.
What’s the difference between a smart bulb and a smart switch?
A smart bulb replaces your existing bulb and is controlled directly. A smart switch replaces your existing wall switch and controls any bulb connected to it, offering more flexibility.


